

When it comes to transcribing audio to text, you can do it yourself, hire a professional, or utilize an automatic transcription service. The best method will depend on factors like audio quality and how you plan to use your transcript. Before we dig into the step-by-step of transcribing audio to text, we’ll review some reasons why you should consider transcription and how to choose the best method for your needs.
In this post, we’ll cover:
- Why transcribe audio to text?
- Methods for audio to text transcription
- How to manually transcribe audio to text
- Automatically transcribe audio to text with Sound Transcription
Why transcribe audio to text?
There are many benefits of transcribing audio to text, but there is also some work involved. If you are wondering whether or not it’s worth the time and money to develop a transcript, here are some things to consider:
- Search engine optimization (SEO): transcribing audio to text makes your content more accessible to search engines, which can increase rankings in Google and drive more traffic to your website.
- Accessibility and legal compliance: under the Americans with Disabilities Act (ADA), audio and video files are required to be made accessible to all regardless of disabilities. Providing a transcript ensure compliance.
- Translation: text can often be translated into different languages more easily than audio content. By developing a transcript of your audio, you are in a good position to make the content available in multiple languages.
- Searchability: when you need to find a specific snippet of an audio file, you often have to listen to the full content to find what you’re looking for. When audio content is transcribed, it’s much easier to search the text for keywords or phrases.
- Repurposing content: you’ve already put in the work to create your audio content. It only makes sense to leverage that content in other ways. Transcription allows you to create blog posts or website pages, social media posts, ebooks or guides, email content and more without reinventing the wheel.
Methods for audio to text transcription
Now that we know when it makes sense to transcribe audio to text, we can talk a bit about the methods of transcription to consider. Depending on your situation, you may want to manually transcribe your audio to text or utilize an automatic transcription service.
There are a couple of key differences you’ll want to keep in mind when making your decision. These include turnaround time, cost, audio quality and level of accuracy needed.
If you don’t need a 100% accurate transcript and a quick turnaround time and low cost are important, automatic audio to text transcription is probably your best bet. You can typically upload an audio file to an automatic transcription service and receive a transcript back in a matter of minutes for as little as $0.10 per minute.
If your audio quality is poor, you can wait a couple of days to receive your transcript, and you can afford to pay a bit more (or do it yourself), it may make sense to consider manual transcription. On average, manual transcription costs $1-3 per minute and takes 1-3 days to turn around, but the end product should be a bit more polished and won’t need the same degree of review as an automated transcript.
How to manually transcribe audio to text
Want to transcribe audio to text on your own? Here’s a step-by-step process to make it as painless as possible.
1. Get a comfortable setup
To ensure success when manually transcribing audio to text, you’ll want to set up your computer so you can easily access your audio file as well as your text. It’s easiest to use a word processor like Microsoft Word or Google Docs for recording your transcript. This will provide automatic spelling and grammar check as you type.
You’ll also want to have a quick way to switch between the two programs as you’ll likely need to pause and rewind the audio as you go. If you have an audio player that can slow down the pace, that can definitely help with efficiency as well.
2. Consider using shorthand
One trick for speeding up manual transcription is to use shorthand for names and phrases that are used frequently. If there are things you know you are going to type over and over, document a shorthand to save yourself some time. You can then go back and use a “find and replace” to automatically replace all of your shorthand with the proper wording.
3. Listen and record
Now you’re ready to start transcribing. Play your audio file and write down what you hear. If you need to pause and rewind, don’t get discouraged! This is all part of the process.
4. Edit and finalize your transcript
If your transcript will be shared with others, you’ll want to proofread it for errors as well as to account for any shorthand used. Consider having someone else proofread as well – an extra set of eyes can help make sure your transcript is error-free.
Automatically transcribe audio to text with Sound Transcription
If manually transcribing audio to text doesn’t fit within your timeline or skillset, you may want to consider using transcription software to automatically convert your audio to text. Sound Transcription is one option that will provide a very affordable transcript in just a couple of minutes. Here’s how you can automatically transcribe audio to text with Sound Transcription:
1. Prepare your audio file
When it comes to automatic transcription, audio quality matters. Factors like background noise, multiple speakers and heavy accents can all affect transcript that is produced.
To ensure the best possible transcript quality, make sure your audio is clear, background noise is kept to a minimum, and speakers are as close to the mic as possible. If you don’t have control over these factors, automatic transcription may not be the best choice for your situation.
You’ll also need to make sure your audio file is in the proper format. Sound Transcription is able to automatically transcribe audio and video files in the form of mp3, mp4, flac, or wav. If your file is in a different format, like m4a, you can use a converter to change the file to an acceptable format.
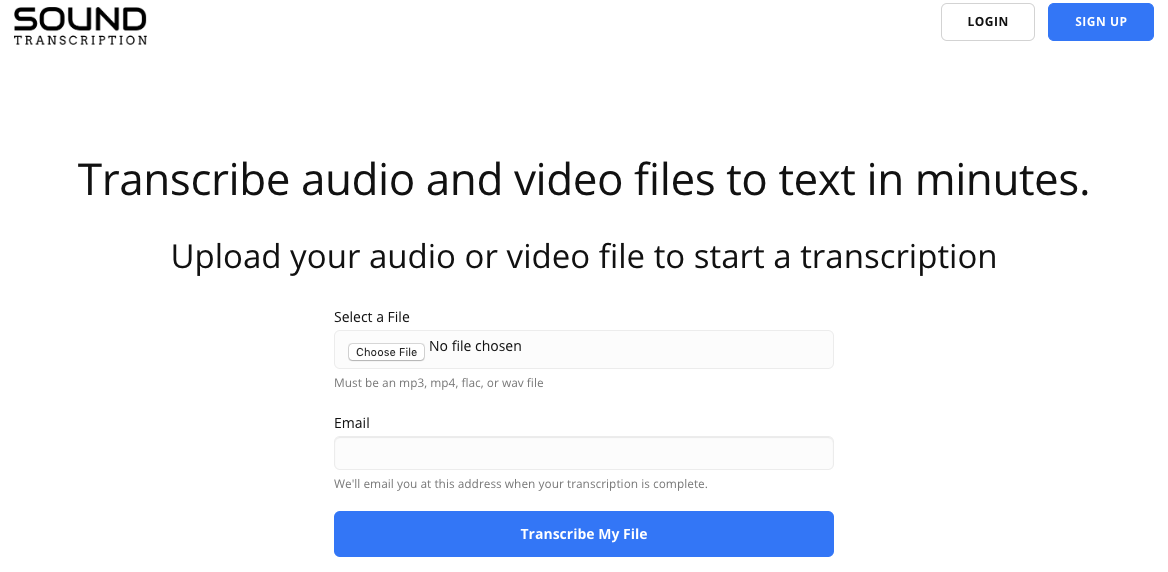
2. Upload your audio file
Once you’re happy with your audio file, the next step is to upload it to Sound Transcription.
Select “Choose File” and browse your computer to find the audio file you want to upload.
Then provide the email where you want to be notified when your transcript is ready.
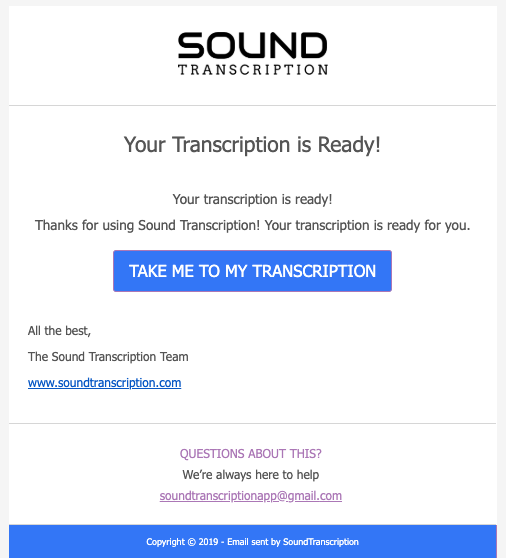
3. Check your email
Sound Transcription will notify you at the provided email address when your transcript is ready. It can take anywhere from 30 seconds to a couple of minutes to receive your email notification, depending on the length of your audio file.
4. Purchase a full transcript
Sound Transcription will provide a 1 minute preview of your transcription for free. If your audio file is longer than 1 minute, and you would like to purchase the full transcript, you can do so at a rate of $0.10 per minute (minimum charge: $1).
5. Download and edit your transcript
Once you purchase your full transcript, you’ll have the option to download it as a text file. Like all automatic transcription services, Sound Transcription won’t provide a 100% accurate transcript, but it should be pretty close.
If you need a higher degree of accuracy, you’ll want to proofread the transcript and make any edits. The most common edits include spelling of proper nouns and punctuation.
0 Comments